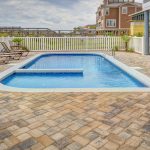
A salt pool represents a contemporary method of pool upkeep that uses a salt water chlorinator rather than the conventional manual addition of chlorine. This system revolutionises your pool cleaning by producing pure chlorine automatically through an electrolysis method that requires only a small quantity of salt in the water.
How Salt Pool Systems Work
The salt chlorine generator integrates seamlessly with your existing pool pump and filter, continuously producing chlorine without the hassle of manual chemical management. Unlike conventional chlorine pools, this method offers significant advantages:
- Reduced chemical expenses and simplified upkeep
- Eliminates harsh chemical side effects like eye irritation and skin dryness
- Creates a more pleasant swimming environment
The Conversion Process
Switching to a saltwater pool system may appear complicated, yet our detailed guide makes the transition easier. Transforming your pool is unexpectedly simple and doesn’t need significant alterations to your current configuration. Actually, you will only need to add one piece of equipment like a salt water chlorinator into your existing pool circulation system, with few compatibility issues and no necessity to fully drain and restart your pool.
Step1: Choosing The Right Salt Water Chlorinator For Your Pool
- Pool Size Considerations: The size of your pool is the primary determinant of chlorination needs. Manufacturers rate chlorine generators by their maximum water treatment capacity. Experts recommend choosing a model with a capacity of 1.5 to 2 times your pool’s actual volume. For instance, if you have a 20,000-gallon pool, consider a 40,000-gallon chlorine generator.
- Climate Impact: Your local climate significantly influences chlorine requirements. Warmer temperatures and increased sunlight dramatically raise chlorine demand. Pools in hot, sunny, southern, or arid regions will need more robust chlorination systems. These environments cause faster chlorine depletion, so you will want a generator with extra capacity.
- Usage Patterns: Pool usage is another critical factor. Pools with heavy traffic, especially those frequently used by children, require more intensive chlorination compared to pools used by only adults.
Step 2: Installing A Salt Chlorine Generator
Before beginning the installation, gather the following essential tools:
- PVC glue and primer
- Pipe cutters or hacksaw
- Measuring tape
- Permanent marker
- Screwdriver and/or drill
- Associated mounting hardware
Safety Warning: This installation should only be performed by a qualified professional. Always disconnect power at the source when working with electrical components, and carefully follow manufacturer instructions, local codes, and safety guidelines.
- Connecting The Salt Chlorine Generator To The Plumbing
The salt chlorine generator integrates into your pool’s existing plumbing system, typically positioned after the pump, filter, and heater. This placement ensures water passes through all existing equipment before entering the salt system and returning to the pool.
To install, you will need to create a gap in the PVC piping. Using a hacksaw or pipe cutters, make two precise cuts where the salt system will be inserted. Most salt chlorine generator cells use unionised connections, which require sliding female threaded collars over the pipe ends.
The installation involves carefully applying PVC primer and glue to the pipe ends and unions, then firmly connecting the components. Each union must be pushed completely onto the pipe and held in place until the PVC cement cures. Once the unions are secured, attach the salt cell using the threaded collars, ensuring hand-tight connections.
Some systems may include additional plumbing components like a flow switch, which are installed similarly to the main salt cell.
- Mounting And Powering The Controller
The control box typically mounts easily on a wall near pool equipment. Depending on the wall material, you might need specific mounting hardware. Most controllers connect to the same power source as the pool pump, which can vary based on your pool’s setup.
Power connection methods include connecting to a mechanical timer that controls the pump, linking to a relay on a pool control system, or synchronising with a variable-speed pump’s controller. Some installations might use a separate timer to ensure the salt chlorine generator and pump operate simultaneously.
Controllers generally accommodate either 240V or 120V power sources, matching the pump’s circuit. However, some models require manual voltage configuration, while others automatically adjust. Power cables may come as unterminated bare wires or with male plugs suitable for weather-protected outlets.
With the installation complete, your pool is now ready for the final step: adding salt to the water.
Once you add the appropriate amount of salt to your swimming pool, you have successfully “converted to salt.” This system automatically generates chlorine during daily pump operation, offering a more consistent and reliable approach to pool sanitation. The cost-effectiveness is remarkable, with industry estimates suggesting potential savings of 40-50% or more compared to traditional manual chlorine purchasing over the generator’s lifetime.
Step3: Fine-Tuning Your Chlorine Generation
The secret to pool maintenance is adjusting your salt chlorine system to generate the exact amount of chlorine required for your pool. In the initial week, you will probably need to make small changes to achieve the ideal balance. The procedure is simple: begin by measuring the existing chlorine concentration, operate the system for a day or two, and then conduct a retest. If the chlorine level is excessively high, lower the output setting; if it is too low, raise it. After several cycles, you will reach the optimal chlorine production suited to your pool’s particular needs. After achieving balance, you will merely need to make seasonal tweaks as temperatures fluctuate over the year.
Concluding Thoughts
Converting to a salt pool system is a straightforward and rewarding home improvement project that can transform your pool maintenance experience. With just a few simple steps, you can install a salt chlorine generator that will save you time, money, and hassle in the long run. The process is far simpler than many people imagine – no need for expensive renovations or complicated equipment changes.
By taking the time to fine-tune your salt chlorine generator’s output over the first week, you will create a perfectly balanced pool system that generates exactly the right amount of chlorine automatically. The result? Crystal-clear water, reduced maintenance, and significant cost savings over time.