It is very important to know about the appliance before we want to learn how to operate. It helps us to become familiar with it and the basic knowledge also helps us to understand better about the machine we are, yet to use for our own needs.
So, when it is about a sewing machine, it is one of the most mutual pieces of equipment which we find in many houses as often we need to patch-up our clothes and dresses or make some unusual things (using a good quilting sewing machine). Nevertheless, this machine is a common piece of equipment, but we factually do not know how it works and what the formal definition of a sewing machine is.
Putting an example, according to Wikipedia, “A sewing machine is a machine used to stitch fabric and other materials together with thread”. Now the question is, how does it works or how to use this thing step by step. In this article, we prepared a few steps for the beginners, and by following them, they can learn to use this machine for their regular use. But before we see it we have to know about some basic things about this machine first.
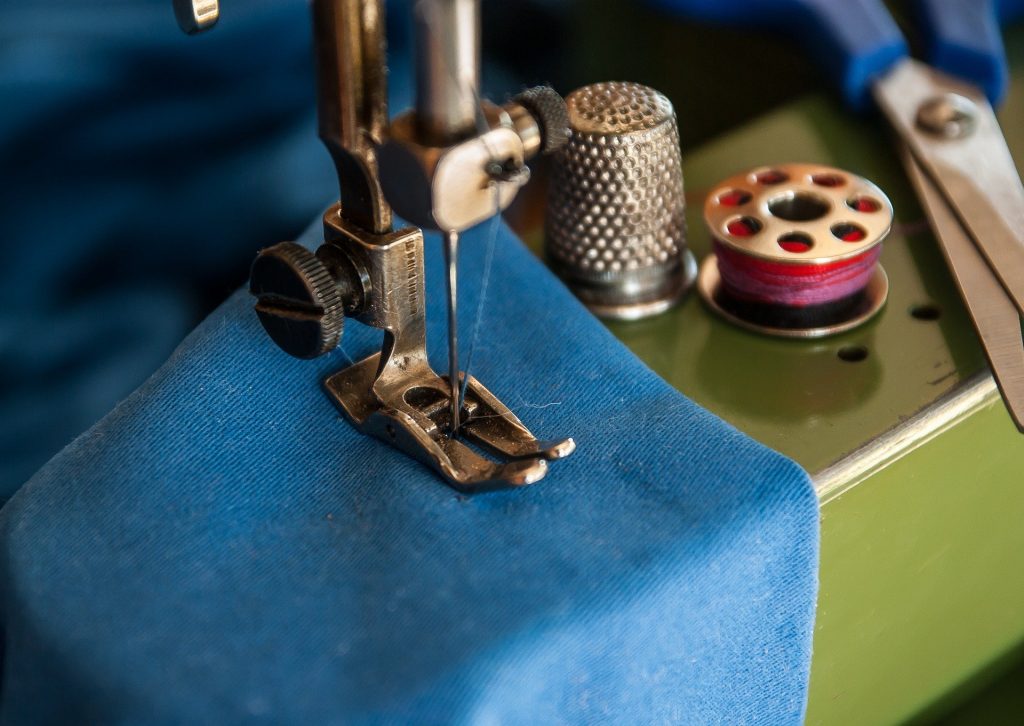
Basic parts of a sewing machine that we must know about:
Nowadays, modern machines have many body parts for a sewing machine, but the bellow list is the basic idea for a typical sewing machine. Before we start using, we should know about these body parts.
- Needle:
- Needle Bar
- Metal Needle Plate
- Presser Foot
- Bobbin
- Bobbin Case (Shuttle)
- Thread Feed
- Thread Tension Settings
- Stitch Length Controller
- Stitch Select Dial
- Reverse Stitch Lever
- Stitching Speed Controller
- On/Off Button
How To Use A Sewing Machine Step By Step
For the beginners to get started with their first sewing project, they have to make sure that they thread the machine by following the manual comes with the sewing machine. Following the user, manual users can easily follow the steps that require to complete the threading process. Finally, when the user is done with threading the sewing machine and also the bobbin is threaded and placed in the shuttle, they are ready to start using. Now there are few more steps to follow, which are given below.
First step: Firstly, the user has to choose the fabric you want to stitch.
Second step: Secondly, the user has to take the presser foot lever up, which generally remains at the backside or opposite to presser foot.
Third step: Thirdly, a user has to put on the fabric below the presser foot from that place where they want to start stitching from.
Fourth step: For straight stitching, metal plates has the procedures given over it. A user has to make sure that they are holding the cloth straight for stitching on the metal plate.
Fifth step: After everything is ready user have to start pressing the pedal and the machine will start working, and they have to move the fabric according to their own requirements sometimes they have to move the fabric backward and maintain the speed according to their need.
Sixth step: Finally, after reaching the final point users have to turn the cloth at a 90-degree turn, while doing that they have to be sure the machine is stopped and the needle is down inside the material.
Following the same process, users have to do the whole stitching process until they are finished.